Beginnings
Any IT admin worth his/her salt knows that virtualization is the big thing in IT right now & has been for a few years at least. It allows you to do things you wouldn’t be able to do on bare metal servers, such as move a server OS from one server to another while it is running (called vMotion). Love them or hate them, VMware is the king of virtualization in the datacenter. Luckily for guys like me (broke), they make a bare-metal hypervisor called VMware vSphere (formerly ESXi) available to use for free.
A hypervisor is basically software that provides hardware emulation. Some of you may have experience running VMware Fusion (OS X), Workstation, Server, or Player (Windows). These are called type 2 hypervisors, meaning they run a hypervisor on top of an operating system. This is a great way to get started with virtual machines or just to get those few Windows programs running on your Mac, but it is not by any means an efficient way to run a virtual machine. That’s where bare metal hypervisors, or Type 1 hypervisors, come in. They’re the only “physical” OS installed on that computer/workstation/server, and they have very little overhead on the actual hardware itself. That means more direct resources available for “guest” VM’s, so performance will be better.
After about 3 years of trying to patch together decent ESXi/NAS/SAN systems for testing/development purposes, I finally broke down & asked my boss to build a workstation. When it was approved (imagine my shock), I immediately started looking for options available. Some invaluable resources for doing research on this kind of expenditure:
- VMware Whitebox HCL: a pretty good parts list of hardware known to work with VMware vSphere (ESXi).
- [Hard]Forum: specifically the Data Storage Systems & Virtualized Computing forums. Lots of guys there have setups at home that rival some datacenters.
- ServeTheHome: good articles & reviews on hardware for whitebox home server builds.
- NappIT: the guy that runs this project came up with the idea for the ZFS/ESXi all-in-one (as far as I can tell). He’s very active on Hardforum & ServeTheHome forum, usually with the handle _Gea, & very helpful.
- VMware Communities: I didn’t spend too much time here, but still a good resource to have.
Design
During my research, my primary decision was trying to figure out if I wanted to buy off the shelf or build my own. Of course, being the geek I am, I gravitated more towards building my own, but I couldn’t ignore all the forum posts of people who bought hardware that didn’t work due to some minor incompatibility. I definitely didn’t want that (especially since it’s so hard to return things where I work), but I also couldn’t ignore that by building one, I’d get a lot more for my $$. I decided to build, & quickly came up with a list of must-have features:
- Intel Xeon processor with Intel VT : for the virtualization goodness.
- Motherboard with the following capabilities:
- IPMI: provides remote console & power capabilities. A must for a headless workstation/server.
- VT-d: provides capability to dedicate an expansion card to a virtual machine, such as a SAS HBA (a must for this setup).
- Only has to support 1 physical CPU (ESXi license only allows one physical CPU).
- At least 16GB RAM
- A SAS/SATA JBOD HBA : no need for an expensive RAID card with ZFS, just a plain JBOD card will do & is actually preferred to cards that do have RAID capabilities.
- Plenty of network interfaces : something you can never have too much of in virtualization.
The Build
So I knew what I wanted, now I had to do a lot of research. I had to make sure the parts I picked would work with ESXi & some Solaris distribution that would provide the storage for ESXi. I also had to keep this all just under budget. Keep in mind this will all be within one physical computer. :) I will say that building a list is the worst part. You antagonize over the little details, then you tweak the config endlessly trying to squeeze every last bit of power out of your budget. Several times I was tempted to just buy a system known to work & settle for less, but I soldiered on. I’m glad I did, because I know I got more for my $$. Without further ado, here’s my parts list:
- 1 - SUPERMICRO CSE-743TQ-865B-SQ Black Pedestal Server Case
- 1 - SUPERMICRO MBD-X9SCA-F-O LGA 1155 Intel C204 ATX Intel Xeon E3 Server Motherboard
- 1 - SUPERMICRO AOC-UG-i4 10/ 100/ 1000Mbps PCI-Express x8 Universal I/O (UIO) Network Adapter
- 1 - SUPERMICRO AOC-USAS2-L8e SAS/SATA Controller Card
- 1 - Intel Xeon E3-1230 Sandy Bridge 3.2GHz LGA 1155 80W Quad-Core Server Processor BX80623E31230
- 4 - Kingston ValueRAM 4GB 240-Pin DDR3 SDRAM DDR3 1333 ECC Unbuffered Server Memory Model KVR1333D3E9S/4G
- 4 - Seagate Barracuda Green ST2000DL003 2TB 5900 RPM SATA 6.0Gb/s 3.5” Internal Hard Drive -Bare Drive
- 4 - Seagate Barracuda ST3500413AS 500GB 7200 RPM SATA 6.0Gb/s 3.5” Internal Hard Drive -Bare Drive
- 4 - Kingston SSDNow V Series SNV125-S2/30GB 2.5” 30GB SATA II Internal Solid State Drive (SSD)
- 1 - SONY Black 18X DVD-ROM 48X CD-ROM SATA DVD-ROM Drive Model DDU1681S-0B : OEM
- 1 - iStarUSA BPU-124V2-SS 1 x 5.25” to 4 x 2.5” SATA/SAS Hot-Swap Backplane RAID Cage : OEM
- 2 - 3ware CBL-SFF8087OCF-05M 1 unit of 0.5m Multi-lane Internal (SFF-8087) Serial ATA breakout cable
- 1 - CyberPower CP1500AVRLCD 1500VA 900W UPS
- 1 - NETGEAR ProSafe GS108T-200NAS 10/100/1000Mbps Gigabit Smart Switch
- Assorted patch cables.
You can see I went with a lot of Supermicro brand hardware. This is an easy way to reduce the risk that your components won’t be compatible, because most of Supermicro’s stuff is based on Intel brand hardware, & that’s almost always a sure thing when it comes to VMware compatibility. That said, you should still double check. I’m happy to say my research paid off; all of this hardware is working as it should. Here’s a shot of everything put togther:
Like I said, everything works, at least from a software perspective. If you look closer at the list, there is one major “gotcha”: the PCI cards are Supermicro’s UIO type card, which is a specific layout designed to work only in some of Supermicro’s rackmount server chassis. These cards are “flipped upside down”, to where the mounting bracket doesn’t line up height-wise with where the PCI slots are on the motherboard. The PCI-E x8 bus itself is exactly the same, so the card does work if you ignore the mounting problem. There’s really no way to make the card fit into an incompatible case without making some modifications to either the card, the case, or both. Considering a comparable Intel 4 port Network card was $350 more, I bought the Supermicro card with the plan to modify where needed.
The modifications I needed to make were not nearly as bad as I thought. I was even willing to jury rig the cards in place using duct tape. This method is a lot more stable, although it does require drilling & cutting. To get the UIO cards to fit in a standard case, I had to make the following modifications to the card bracket & case itself:
- Cut two of the cross braces off of the case using metal shears. Don’t use a saw because it’ll create a lot of fine metal particles & you don’t want those in your case. Most case material is soft enough to cut through with a decent pair of shears. (Yellow bar in below picture).
- Take off the mounting bracket from both cards, which is easily done by unscrewing two screws. Drill a hole the same size & location of the regular mounting hole (Red oval in second picture). Clip off the tapered end of the bracket (Yellow rectangle in third picture).


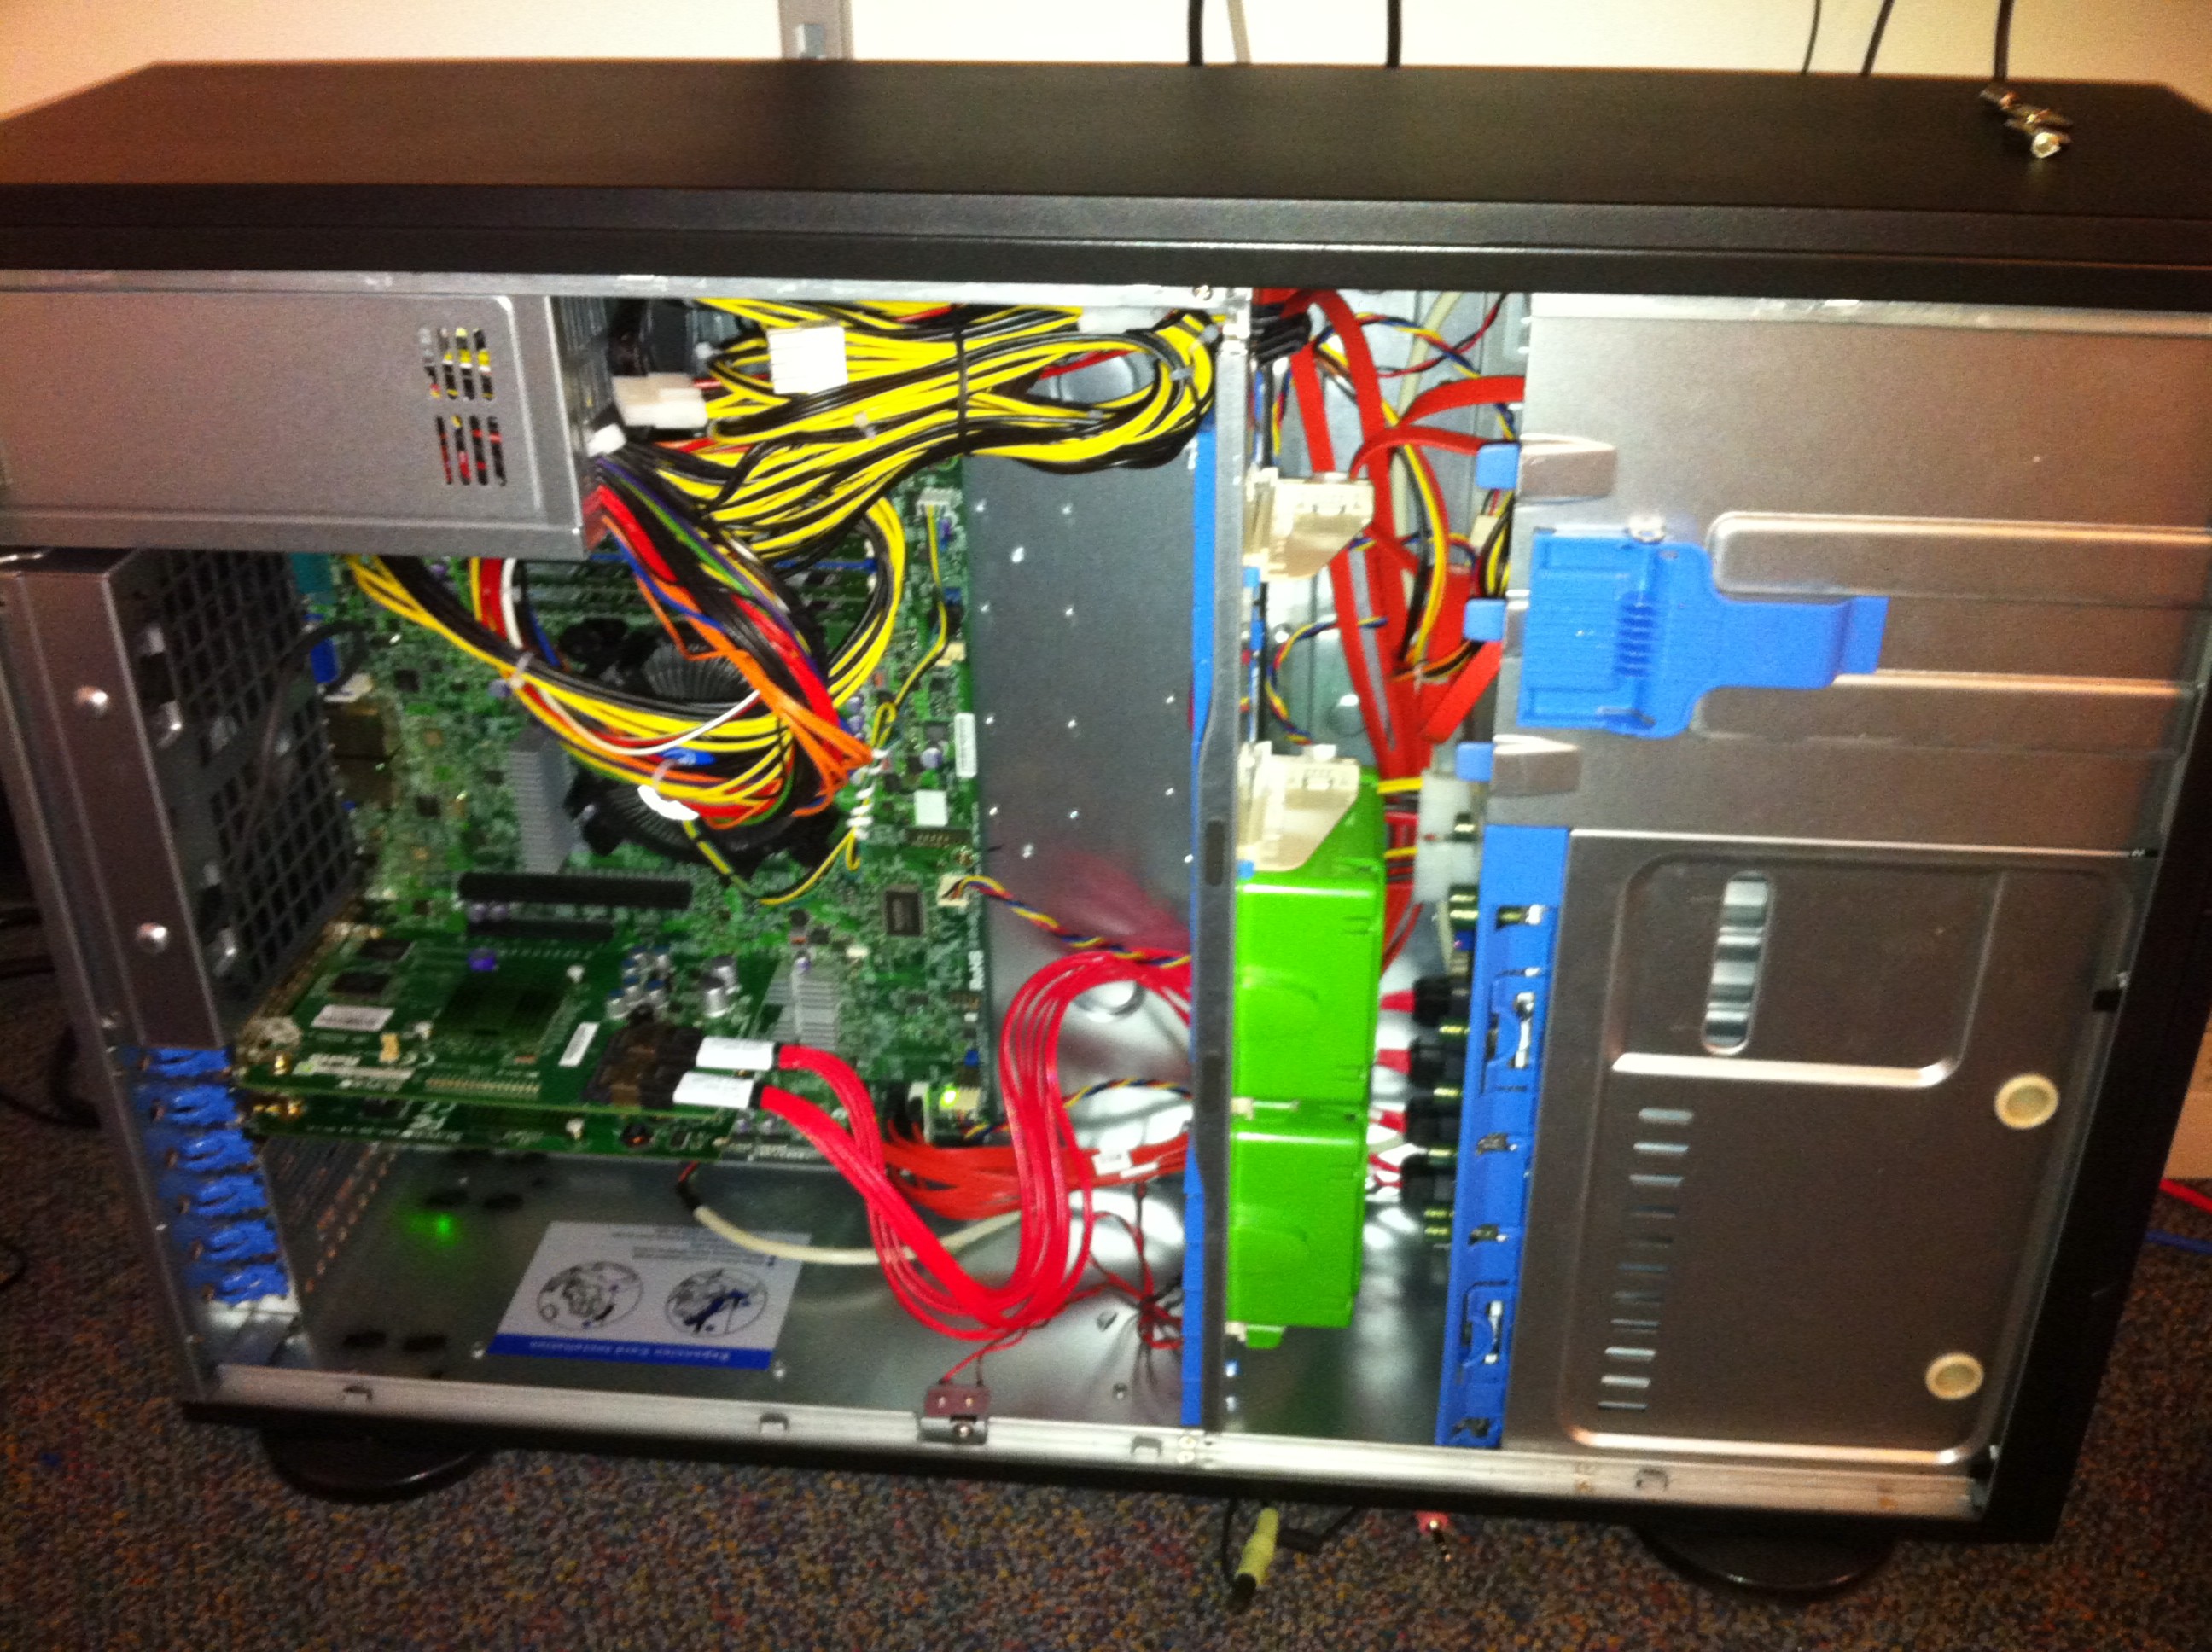
Here’s a picture of behind the case with both cards installed:

While it’s not quite as much support as a regular bracket would give due to clipping the tapered end off of the bracket, it’s still good enough in my opinion. As long as you don’t put any unnecessary strain on the card (don’t pull on the network cables), it should be fine. Needless to say, doing this voids some of your warranties, so make sure it’s worth it to you. This is a development/testing workstation for me, so the added benefit from a technological perspective outweighs the “build it right” factor. In a production system, I would never do this. I also wanted to add that if I ever do need to put a standard PCI-e card in either one of these slots, it will still fit.
The Supermicro parts are top notch, I would definitely recommend them. You’ll pay a little more up front, but you get a lot more in return.
Another big plus was I didn’t have any DOA parts; that was something I was slightly fearing from ordering everything a-la-carte. Apparently that does happen to some people. I’ve never had it happen to me (knock on wood).
Wrap-up
So that covers the parts, build, & case modifications. I got all of this for under $3k, which is not bad considering I now have both a hypervisor & filer to play… er, test with. You could probably do it cheaper if you cut out the SSD’s & substituted the Supermicro case for something smaller. I was eyeing a Fractal Design case, but decided to pay a little more for the better PSU and hot-swap drive bays in the Supermicro case.
The next blog post, I’ll cover how I configured VMware vSphere 4.1 & NexentaStor 3.0.5 to actually provide the ZFS NFS datastore for ESXi’s VM’s. Most of it is already on the Napp-IT page as well.