Prelude
To (finally) follow up on my original post, ZFS/ESXi All-In-One, Part 1, this post will go over how to configure ESXi & NexentaStor to work with each other, all from within one physical server. Typically, ESXi will connect to a physically separate server or appliance that provides storage. For production environments, this is preferred. For testing/development, it can be prohibitively expensive. The All-In-One solution provides a good alternative.
Config
First thing we need to do is get NexentaStor installed in a VM. For obvious reasons, this VM needs to be on local attached storage available to ESXi. In my previous post, you noticed I had some SSD’s in the box. The SSD’s are attached to the motherboard’s SATA controller ports. One SSD contains ESXi itself, & I dedicated another one of the SSD’s for hosting NexentaStor’s VM. These can be set up in the vSphere Client’s configuration screen:
You basically just format the SSD with VMware’s VMFS, then install NexentaStor’s VMDK into that volume. When I set up my NexentaStor VM, I allocated 2 CPU cores & 8GB RAM. You can get away with one core, but you want to give NexentaStor as much RAM as you can. Also one of the nice things about NexentaStor is that Nexenta has included their own compiled vmxnet3 driver in NexentaStors repos. I think they also have open-vm-tools, but I still use VMwares. I install VMware’s tools first, then attach/create the vmxnet3 NIC & install the vmxnet3 driver. When you set up the VM, you may have to use a temporary E1000 NIC to get basic network configuration so you can get NexentaStor set up, then add the better vmxnet3 NICs later. Here’s a good how-to about installing the tools on NexentaStor, and also a workaround for a problem you’ll run into regarding running vmware-config-tools.pl.
Once NexentaStor is set up, we have to configure it to see the local drives in the server. These drives are attached to the SAS/SATA JBOD controller we bought. It was important to pick the right disk controller because we need to be able to pass it through to the VM directly. This is called VT-d passthrough, a feature ESXi has that allows allocating hardware (usually PCI devices) directly to a VM itself. Usually all hardware passed to a VM is virtualized by ESXi, but in this case, NexentaStor needs direct access to the drives themselves to work it’s ZFS magic. So, in the same ESXi Configuration panel, passthrough can be configured in the “Advanced” section:
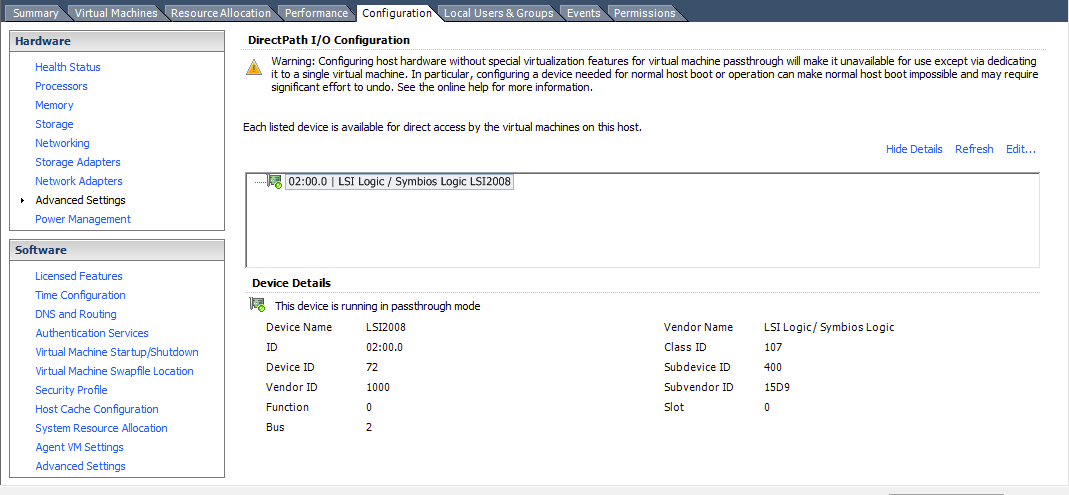
What this does is marks it as available for passthrough to a VM. ESXi will no longer be able to use that device itself. You will have to reboot ESXi after configuring passthrough. Once it has been rebooted, we need to assign the card to the NexentaStor VM. To do that, go to the NexentaStor VM’s configuration window:
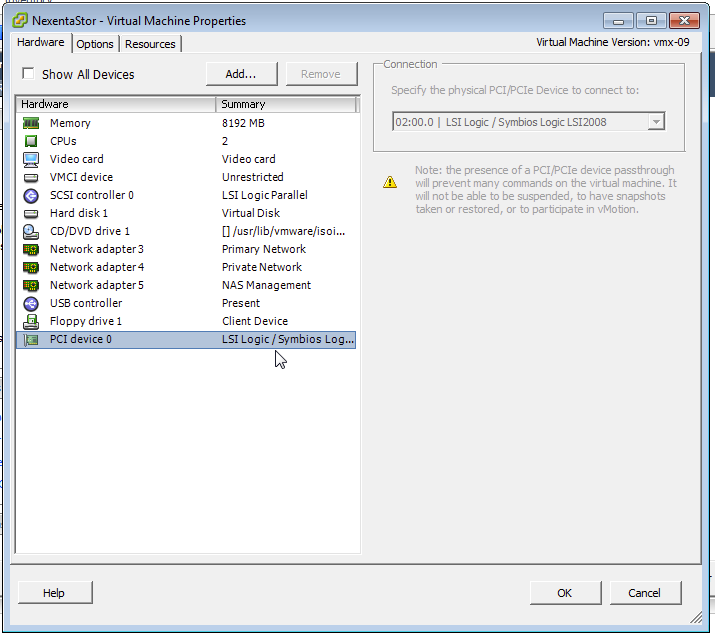
What you will need to do is click “Add:”, & you should see the model storage adapter itself. Click OK to add it to the VM, then start NexentaStor up. Once it comes up, you should see whatever drives are plugged into the adapter:
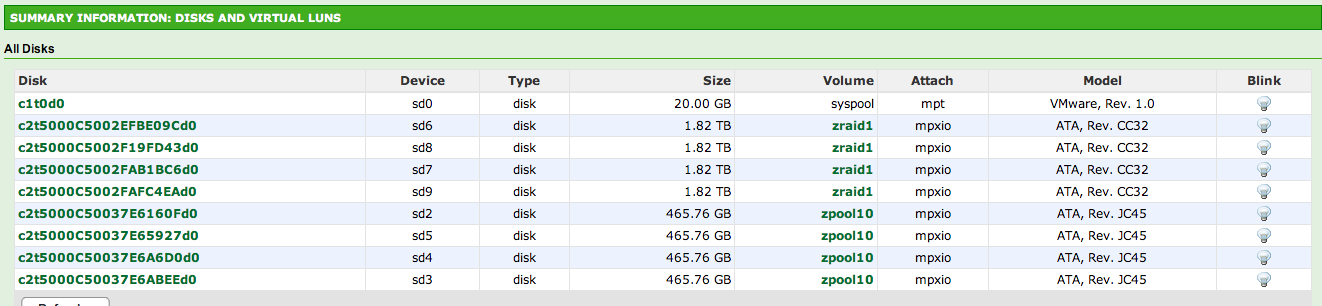
Notice the first one on the list is the VMDK, but the rest show up as physical drives. This is what we want. In my case, I have 4x500GB drives & 4x2TB drives. Yeah it’s a lot for a home lab, but I’m using NexentaStor for more than just SAN storage for ESXi. I’m also using it for data storage via SMB/AFP/NFS/Crashplan, but that’s another post coming soon.
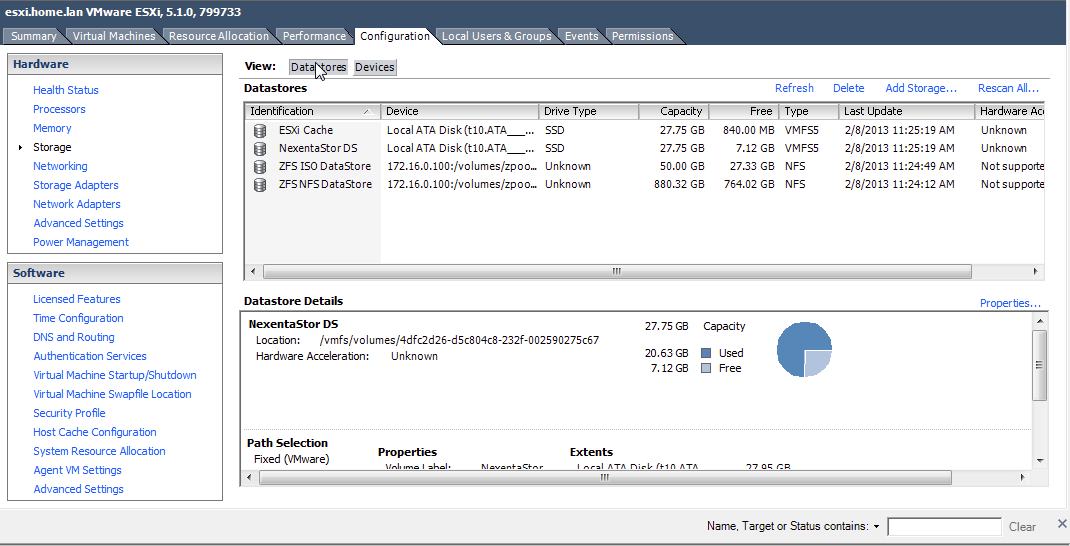
When configuring storage for ESXi, You want as much performance as you can get. A good, cheap way to get performance with ZFS is using striped mirrors, or RAID10. This can be done on the NexentaStor Data Management panel. The end result should look like this:
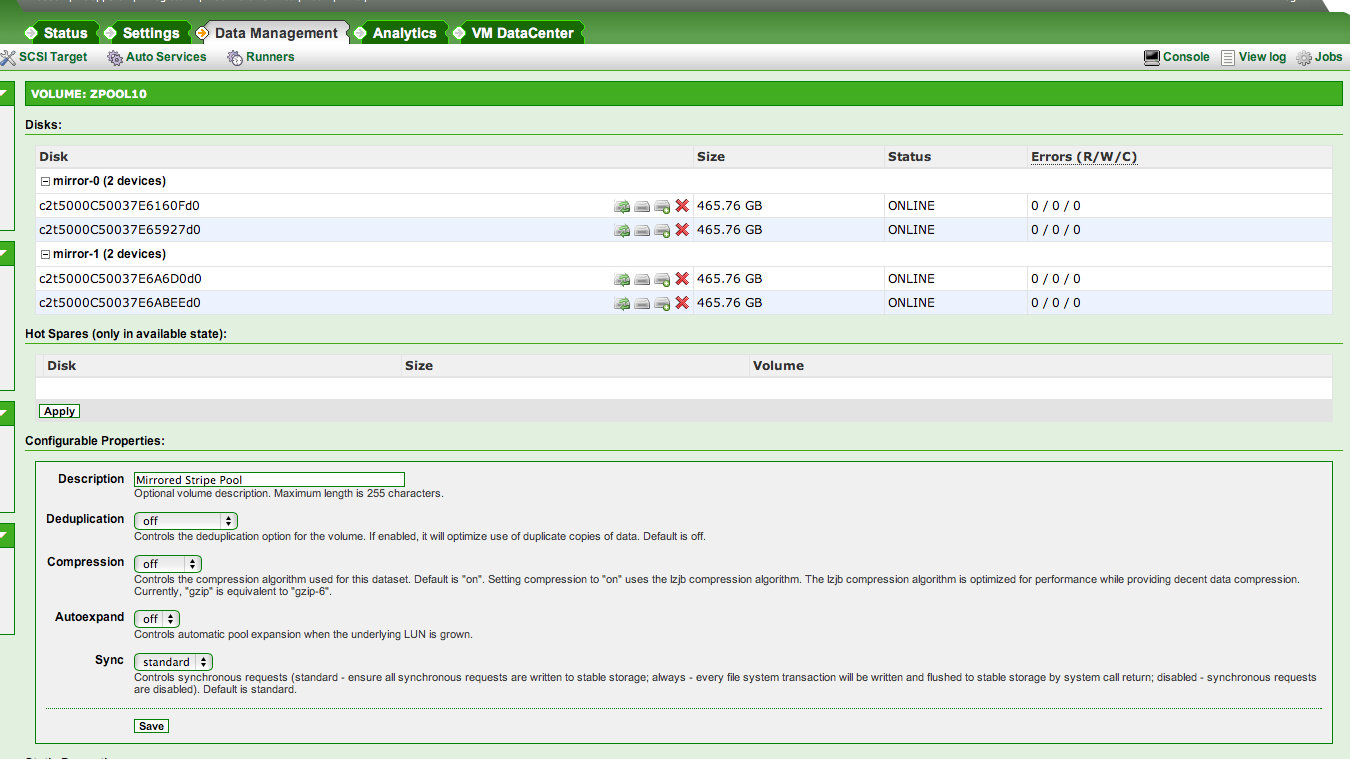
One of the nice features I’d like to be able to test in this setup is deduplication, because VM’s dedupe very well. However, dedupe is very RAM hungry & this setup just doesn’t have the resources for it. Hopefully I’ll upgrade the server to 32GB RAM soon then maybe try out dedupe. There are still other nice features for hosting on ZFS datastores, such as snapshots.
Now that we have the volume created, we need to put a ZFS filesystem on it & share it out to ESXi. NexentaStor calls ZFS filesystems “Folders”. I created a folder called “VMware” & shared it out via NFS:
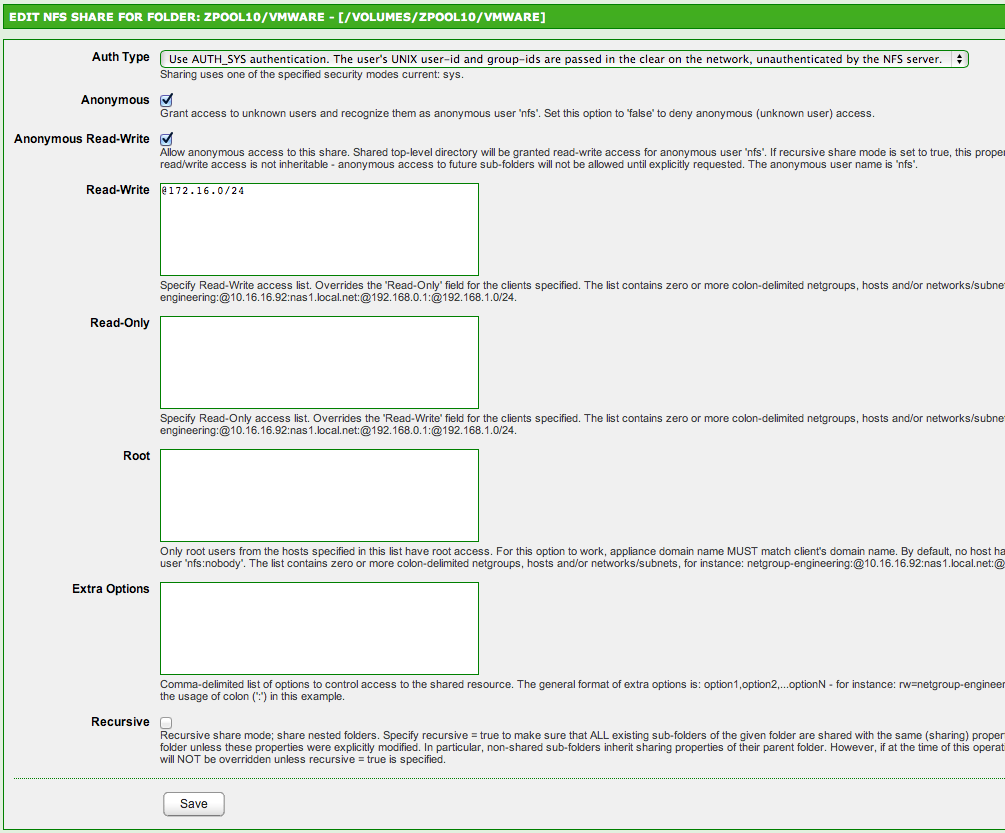
I haven’t done any tweaking in the ZFS properties. I also made the folder read/write to everyone/anonymous, but I’m only exporting it to the single ESXi host itself. If that doesn’t make sense, google “exporting NFS filesystems” for a primer.
Now we need to get the exported storage visible to ESXi. To do this, we create a virtual switch in ESXi. In your ESXi host’s Configuration panel, click Networking, Add Networking. Then select these options:
- Select VMKernel as the Connection Type
- select vSphere Standard Switch
- Give it a name, ignore VLAN tag.
- Choose a non-routable class IP; I went with 172.16.0.1/255.255.255.0 because I’m not using that class anywhere else on my other networks.
- Click Finish to create the switch.
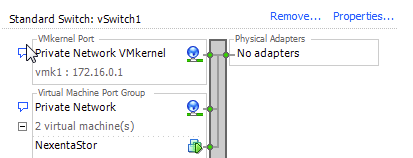
What this will do is allow direct TCP/IP communication between NexentaStor & ESXi itself. The cool thing is the switch is virtual, & is only limited by the hardware you’re running on. I’m not sure what limitations on virtualized switches are & how the correlate to what CPU/RAM is available for ESXi itself, but I haven’t noticed any performance issues at all & the endpoints are full 10Gbe, thanks to vmxnet3. :)
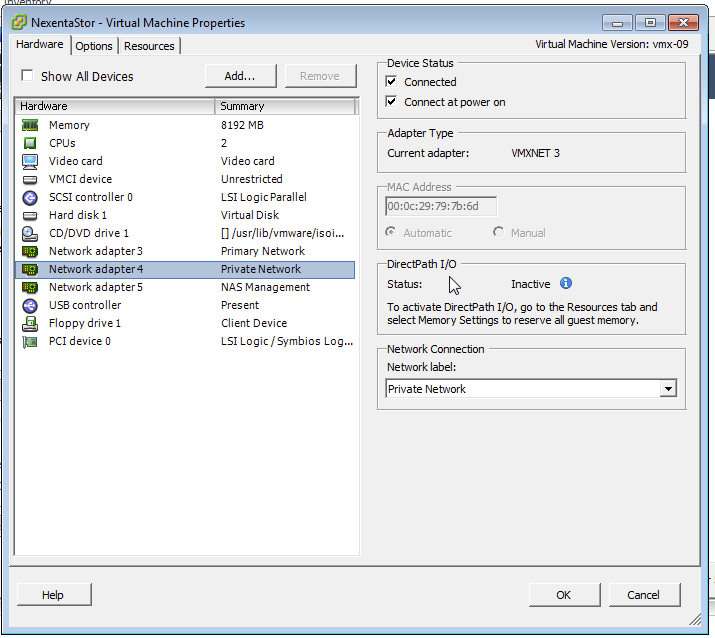
So the last part is we need to create the NIC for NexentaStor that will use this virtual switch, so NexentaStor can provide the storage to ESXi via NFS. Make sure you connect the NIC to the virtual switch, whatever you named it. Mine is named “Private Network”:
Once that’s done, set a manual IP address via NexentaStor:
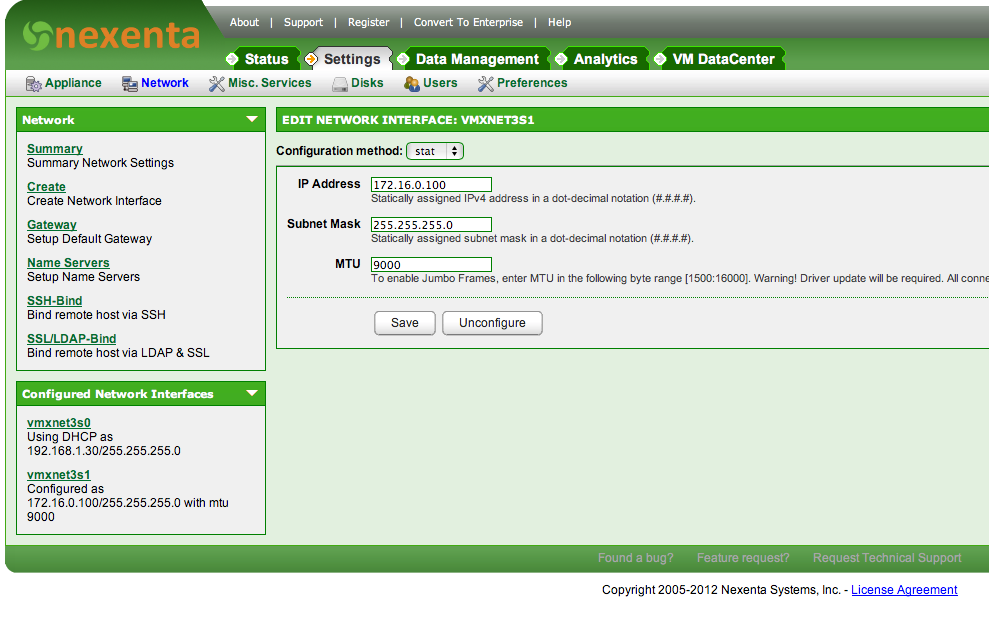
The IP can be anything you want in the subnet range of the switch 172.16.0.2-255, I just chose 172.16.0.100 for no reason.
Now, everything is configured as it should be from an operational standpoint. We can go to the ESXi host’s configuration panel & add the NFS storage:
- Click Add Storage
- Network File System
- 172.16.0.100 (IP for NexentaStor)
- Path of the NFS export (/volumes/
/ ) - Give it a name (ZFS NFS DataStore).
- Finish
End product should look like that. I also have a separate ZFS filesystem for hosting ISO’s, just in case you were wondering. Now you can test this out by creating a new VM & putting it on the newly available datastore. Mine’s very fast, Win2k8R2 server takes 2 seconds to boot up. Latency spikes are 13ms at max, & averaging ~3ms. Not bad. :)
Notes
The last thing you might want to think about is making the NFS storage available right after ESXi boot. You don’t have to do this, but you’ll have to start NexentaStor manually each time ESXi is rebooted if you don’t before you can start the rest of the VM’s. I recommend doing it.
To do this, again in the ESXi host’s Configuration panel, under Software, check out Virtual Machine Startup/Shutdown. You can set the NexentaStor VM to automatically start up after ESXi has booted. As far as the delays go, I leave mine as the default 30 seconds. The tricky part is if you want to auto-start VM’s that reside on the NFS datastore; getting that timing right can be a challenge. I don’t have any advice there; just trial & error.
Wrap-up
I’ve been using this setup over a year & it has not caused me any problems (knock-on-wood). That said, I’m writing this post mostly from memory. I may have left a detail or two out of the setup, so if I did, please let me know in the comments. I’ve had as many as 10 VM’s running simultaneously with zero throughput problems, but that’s mainly b/c they have little to no load. This setup is great for trying stuff out. My hope would be one day having another ESXi host & a vCenter license to do more fun things like vMotion. One can dream :)