One of the lesser known features in OS X is the ability to resize your hard drive partition without losing data. No special software or gimmicks are required; this is built right into the OS. You can repartition your boot drive or any other drive your computer is using, such as external drives. Multiple partitions can have a lot of good uses. In my case, I have been beta testing OS X Lion, & I didn’t want to use an entire disk or lose the ability to boot to Snow Leopard as my primary OS, so I resized one of the extra disks in my Mac Pro to add a 100GB partition & installed Lion to that. When I’m done with my testing, I can boot back to my primary Snow Leopard OS, fire up Disk Utility, delete the partition I created for Lion, then resize the disk back to normal. Pretty cool, huh? Here’s how to do it.
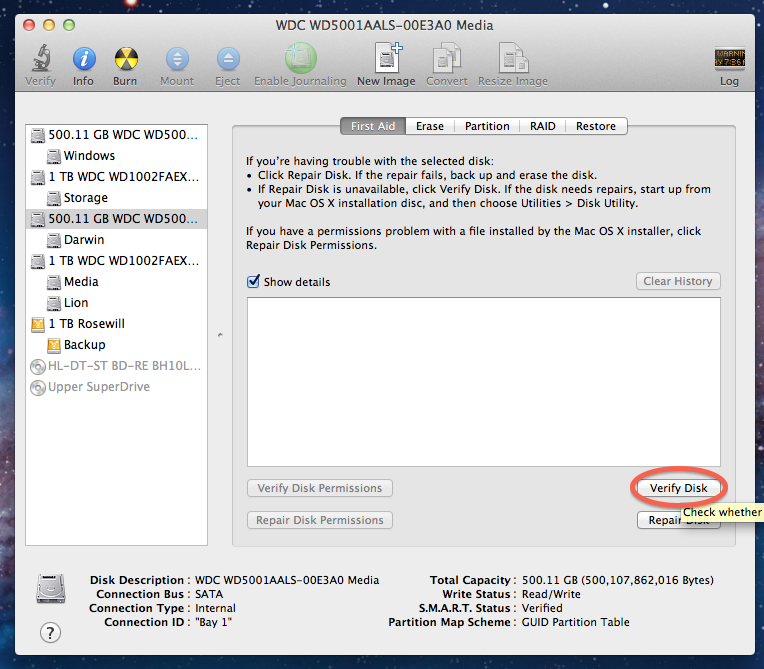
First off, open up Disk Utility, which is in Applications, Utilities. Before we do anything, we want to check the disk’s filesystem consistency to make sure it’s clean. Select the actual disk or the volume on the disk & click “Verify Disk”:
If it comes back clean, you’re good to go. If not, try “Repair Disk” & repeat until it comes back clean. If it takes more than a few times, something else might be awry & I recommend you get the disk checked out.
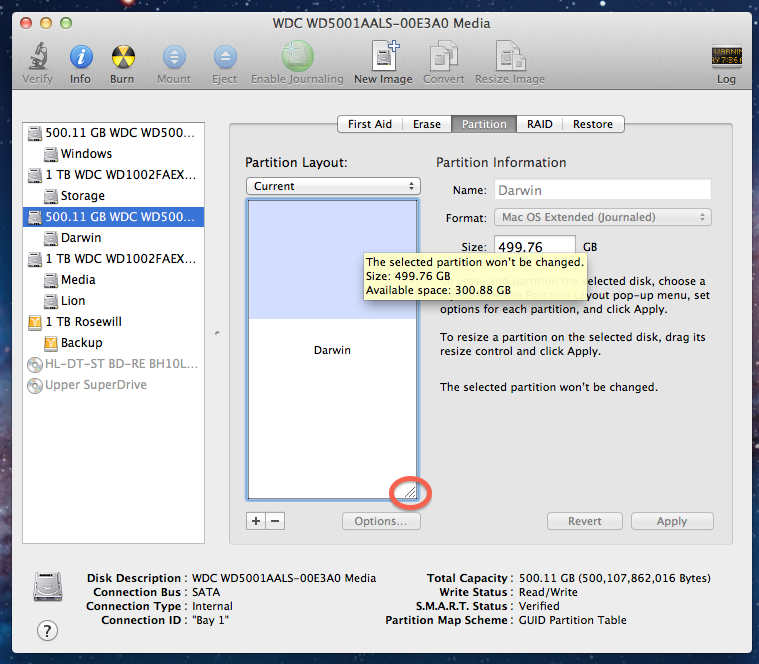
Once we know our disk’s filesystem is clean, we can now resize the partition however we want. Make sure you have the right disk selected & click on the “Partition” tab:
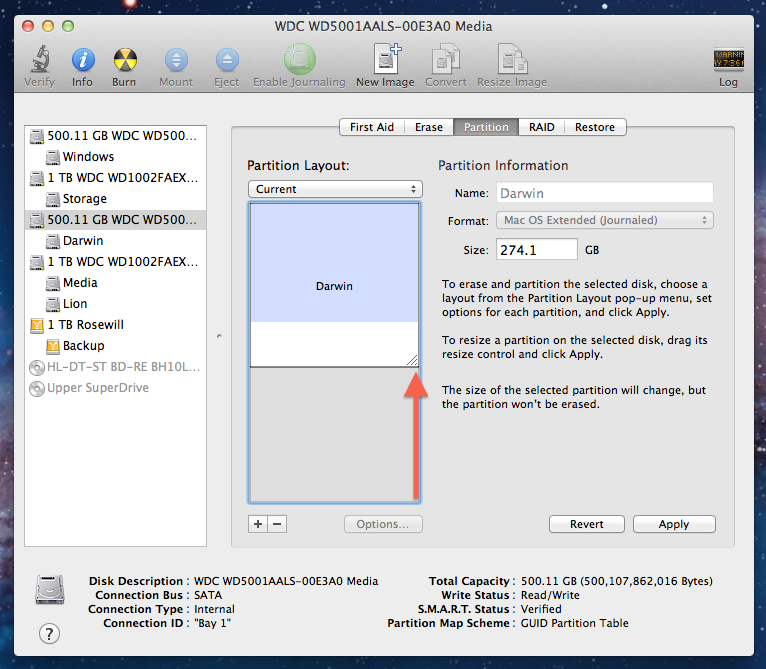
You can see this disk does only have one partition that encompasses the entire disk, and it does have some data on it (indicated by the blue shadowed area). What usually escapes most people’s attention is the little arrow at the bottom right of the disk space indicator. You can drag this to resize the volume as you please, but of course, you can’t make it smaller than the amount of data that’s on it. You also want to leave some breathing room on the disk, as filesystems need breathing room to perform optimally. So, knowing that, we can drag the arrow to resize the partition how we want:
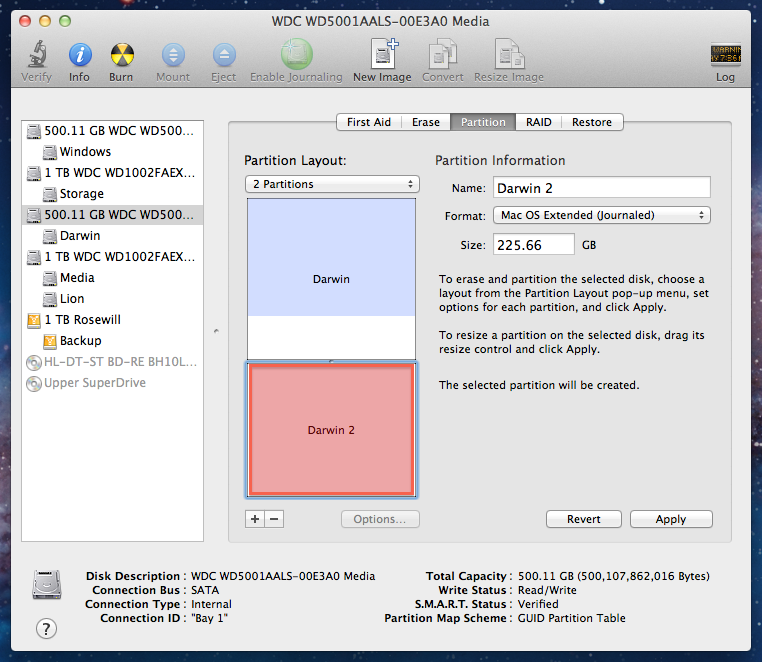
Once we’ve done that, you can now add additional partitions:
If you want to add more, just resize the second and add a third. Once you’re happy with how it’s set up, make sure there are no files or processes accessing the disk & click Apply. Disk Utility will unmount the disk & work it’s magic & the new volumes will re-appear shortly after.
While I have never lost data from this process, you should always make sure you have a viable backup before doing anything like this to your disk. It’s also worth noting that you cannot resize a regular HFS filesystem, it must be HFS+. However, HFS+ has been the default OS X filesystem since 10.4 (Tiger), so chances are you’re using it.
See? Easy.


